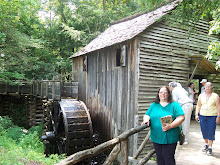
Well, THAT didn't work. I was unable to get the warp weighted loom fully functioning yet again this time. I lost the cross while moving it back and forth. There were other problems, too.
Major Problems:
The loom must be completely assembled FIRST, in place, in order to properly warp it. The set is in the church parking lot and we don't have access to it until a week before production. The loom has to be moved, and time is lost untangling the warp and setting it back up again.
The loom is basically a very large prop and resembles a bunch of lumber and sticks when it is not assembled. Pieces were broken and some were missing this year.
Warping and setting up the loom took a huge physical toll on me this year. I would work setting up the loom for 4 to 6 hours, but then I was a basket case for the rest of the day and the next. I could not move without intense, crippling pain. I bulled ahead and did it anyway, and I became a weeping exhausted mess.
I've come to the conclusion that I can't and won't do the loom next year. I can't do it by myself and with no one else interested in learning how to do it, it seems pointless to continue. If we have a loom at Journey to Bethlehem in the future, opting for a double beam vertical/tapestry or variation of the Navajo loom set-up would be wiser.
Instead, I will spin. I want to try my hand at spinning flax again. I will wait and see if we are actually going to run the production this year and think about supplies then.
Showing posts with label Journey to Bethlehem. Show all posts
Showing posts with label Journey to Bethlehem. Show all posts
Saturday, February 16, 2013

Sunday, November 11, 2012
Tangled Webs and Cardboard.
Weaving class is over--for this quarter, anyway. I got the string heddles done and put on the loom.
The warp beam has been residing in the back of my van for the past two weeks. I had to move it when the family went out to dinner on Friday. I had the boys put it on top of the washing machine in the garage. I did laundry today, so now it's in the front room.
I've been trying to untangle the bottom part of it. I got the old spacing chains from last year off. That was a major hassle in trying to untangle things.
You are probably now screaming at your monitor "Why is it so tangled? How did she let this happen? Didn't she know it would be an Herculean task later?" Angst, angst, angst!
(Since you're probably reading this because I posted the link on my facebook page, you may NOT be yelling things at the computer and are getting the glazed eyeballed stare of impending death from boredom. If you are related to or are well acquainted with me, asking the above questions is kind of pointless, isn't it, because you know the answer is "Because it's Audrey!")
For all two of you who may not have known me since kindergarten and before, I will answer the questions in the form of a prescription for rolling up the loom with a work in progress. But briefly, Yes, I did know it would be this difficult later when I rolled up the beam the way I did last year.
Last year, at the end of the last night of Journey to Bethlehem, it was fixing to RAIN. Hard. I got the beam down and took it up to the props room, somehow. I don't remember that exactly. I packed up all my things, and then got my son to help me roll up the beam very quickly, so we could get it to my van before it started raining. It was starting to sprinkle as we walked to the car. Not just sprinkle spray, nope, it was slooooow, BIG, fat, drops of water, picking up speed with each succeeding drop.
If you are doing a warp weighted loom for demonstration someplace, a renfair, an SCA war or a re-enaction event, you will have to disassemble and move the beam and the loom with an unfinished project on it, unless you are a blindingly fast weaver.
Put a tarp, canvas, or a large piece of corrugated cardboard flat on the ground in front of the loom. Take down the beam, and place it just above one end of the tarp. Roll up the beam the way you do when you are rolling the woven cloth onto a modern floor loom with the cardboard.
Cardboard isn't period at all, unless it's late 1800's, in which case, you wouldn't be using a warp-weighted loom. It would be difficult to wind a sheet of cardboard on the beam because of the way the loom is configured. I suppose you could use sticks, but then you risk snagging the fabric. If you are rolling it up to move and "historicity" is important, then you could use a canvas, or maybe one of those bamboo mats like they sell at a hardware warehouse store in the garden department.
By the way, when you started weaving did you know that you need to have a refrigerator box worth of corrugated cardboard for both beams? I didn't know this. What is more, I haven't come across much on this important little tidbit of information in any weaving pattern, magazine, or book I've seen. Of course, it's possible I may have missed something. I haven't read absolutely everything there is out there on the subject and I usually only read English language publications.
You get this information from another weaver, and it's usually an offhand, "oh, roll some cardboard in between the layers on the threads and the cloth beams so they don't stick to each other."
So what did weavers use before cardboard was invented? Most likely they used sticks. I've seen that mentioned, once, fairly recently in a magazine article, I think. I tried to Google this and was unsuccessful in finding the topic. So if you see this and have any historical information on it, please comment and let me know.
Tuesday, October 23, 2012
Ricotta 2
Making Ricotta again!
This time, I'm doing things a little differently. I made a half batch, that's a half gallon of whole milk and two cups of buttermilk. I'm checking how long it takes to get from fridge temperature to the required 180 degree mark.
At 10 minutes in, the milk was at 100 degrees, according to the candy thermometer.
At 17 minutes, it is looking "cottage cheesy" and resembles the ceiling texture in most of my house. The temperature was 150.
It has now reached 180, and that is at about 20 minutes. Now to ladle it out and let it drip for an hour.
It's easier working with a half batch.
Wednesday, October 17, 2012
Plans and spacer chains and heddles! Oh, my!
It occurs to me that you might be interested in my warp weighted loom plan. I need to give credit where it is due. The plans I have used are mainly from the old Early Period Magazine. It was an SCA publication, I think. It has not been published in quite some time, but here is the link to the archives:
The articles are in Issues 2 and 3, Making a Warp Weighted Loom and Warping Your Loom, respectively. These plans have been THE most helpful to me, mainly because there are drawings to look at. If you want to use the plans from these two issues, send the people who run the website an e-mail and ask for permission. I'm sure they will give it--when I asked, they were very nice--but it's better to ask first.
When I began researching this topic, there wasn't a lot of information out there. There is more now, including some particularly good videos on YouTube by a young man who was doing a college project. I have not found any plans that are the equal of the ones from Early Period Magazine, which was the first set I came across. The videos give additional visual impact, but merely add to the information already presented. What I'm doing here is relating my experiences with warp weighted looms.
Some plans I came across call for "sizing" the warp. Sizing means putting a mixture of glue and water (or starch) on the warp threads so they will be stiff and strong while you are weaving them. You have to wash it out of the project when you're done. I don't think this is a necessary step for the time period I'm working in (1st century BC-AD). I also fear that if I tried to do this, it would result in a huge sticky mess. It also assumes that you are using crochet cotton for the warp. I don't really want to think about trying it on wool.
The sizing recipe calls for 4 to 5 pints of water per one pint of Elmer's school glue. You mix it up and toss the skeins of warp into it, squeeze out the excess and hang it up to dry.
If you don't have a wide-ranging primitive or small loom background, such as a familiarity with backstrap, rigid heddle, tapestry or inkle looms you may have problems with some aspects of the Warp Weighted loom. When I started this, I had absolutely no idea what I was doing or getting into. I had woven two projects on a table loom in high school some 25 years ago (30 now!). You may be far more ahead on this than I was.
As I mentioned before in the post of September 29, 2012, entitled Making String Heddles for the Warp Weighted Loom, I have trouble making the continuous heddles. Another blogger here on blogspot used a netting shuttle to make her continuous heddles, but she has experience with backstrap looms. (I, on the other hand, had to look up what in tarnation a netting shuttle was!) On my current project, I've decided to make loops. The author of the Early Period articles covers string heddles in much more detail than anyone else, including diagrams of how to make a continuous heddle and spacer chain. If you have trouble interpreting a static image diagram, such as stitch illustrations for crochet or knitting, you will have difficulty interpreting these, also.
As I mentioned before in the post of September 29, 2012, entitled Making String Heddles for the Warp Weighted Loom, I have trouble making the continuous heddles. Another blogger here on blogspot used a netting shuttle to make her continuous heddles, but she has experience with backstrap looms. (I, on the other hand, had to look up what in tarnation a netting shuttle was!) On my current project, I've decided to make loops. The author of the Early Period articles covers string heddles in much more detail than anyone else, including diagrams of how to make a continuous heddle and spacer chain. If you have trouble interpreting a static image diagram, such as stitch illustrations for crochet or knitting, you will have difficulty interpreting these, also.
 |
| My loop string heddles. |
I do my loom set up before Journey to Bethlehem opens. Weeks before, in theory, but sometimes life happens. I don't do it in costume and I don't use period correct tools; I use scissors, crochet hooks and a tape measure. During production, if anyone is interested, they can weave a couple of picks.
Another thing to consider is spacing the warp with a chain (I crochet mine, that's the easy part) and your eyesight, if you are using weaving threads. You don't have to crochet it, you can make the chain using just your fingers (that's in the House Barra archive, too). Crochet is not period (1800's I think). Unless you are doing the set up as part of the demonstration and need period accuracy (and there are people around who will KNOW the difference and will take points off or something) or you don't know how to crochet, I wouldn't worry about the anachronism.
 |
| This is a spacer chain on a previous project from 2006. |
Either use the same type of thread you are using for the warp, or at least the same or smaller weight or ends/wraps per inch for the spacer chain. My current project uses a wool yarn warp and weft. If I were to use the same yarn, then it would stick together. I'm going to use a blue cotton/bamboo size 3 or 5 crochet thread for the spacer chain and heddles. This is so I can see and feel the difference the chains and heddles from the project in the dark, since our production times are always at night.
If you are crocheting the spacers, use the crochet hook recommended for the gauge of the thread. For example:size 5 to 7 steel crochet hook for a size 10 bedspread cotton. The larger the number on a steel hook, the smaller it is, whereas it's the opposite for the aluminum and plastic ones. Why does it depend on the gauge of the thread? Because I used a plastic M or N size hook, once, when I had a warp that (if crocheting) normally took a size D or C hook. The spacer made the warp too wide for the weaving width and I had to re-do it.
Wednesday, October 3, 2012
Warp Weighted Loom Update
So last night was Tuesday and weaving class. Someone at class mentioned that I should take pictures to document what I was doing. So I will do that next time I'm at class and post them here.
Last week, I had counted the warp threads and slip knotted them by groups of 10. The final count was 440! This week during class, I spent the time separating the front and back threads. I used a weaving sword or pickup stick (whatever) and lease sticks.
Here are a few terms for you if you are new to weaving (I can feel eyes glazing over):
A weaving sword or pickup stick is a long, thin, flat, slat of wood that is pointed at one or both ends. Its purpose is to slip in between the threads so you can lift or pick up all of the warp threads at once in order to weave.
A lease stick is also a long, thin, flat slat of wood, with the ends rounded, not pointy. It is slightly thicker than the sword. Lease sticks are usually included when you buy a modern floor loom. A lease stick should be slightly longer than your warp. If you have a place that sells lumber, like one of the warehouse hardware stores, they would be cheap and easy to make. Lease sticks must be sanded smooth so the warp won't catch and snag or fray.The purpose of lease sticks is to keep the cross of the threads.
The cross (weaving, not Christianity) is where the front and back threads cross each other so you can pull the back threads forward in order to weave.
In order to make things a little easier, I am going to refer to the group of warp threads in front as the A threads. The warp threads in back will be the B threads. With a warp weighted loom, the front and back threads are divided by the bottom brace, and weights are hung on the warps instead of wrapping the warp between two beams as in more modern looms.
Now that we have definitions of terms, we can proceed. I picked up every other thread in a group of 10, and slipped it on top of the sword, so that I had 5 in front and 5 in back. When I was done, I stuck a lease stick in the shed.
Next, I took the back threads and brought them forward through the front ones, and slipped the sword in between them. I did not finish this part by the end of class. I only have a few more bundles of 10 to do, though, so I am happy with my progress. Besides, next time, I will bring my camera so I can take pictures!
Note: It is much easier to do one set of threads (A or B) at a time. The reason I'm doing them at the same time is because I messed up. I skipped several when I was slipping them from the sword to the lease stick.
I still have to make more heddles. I have 10, so far, so that's 430 more to go! Ha. I also have to make more weights.
Last week, I had counted the warp threads and slip knotted them by groups of 10. The final count was 440! This week during class, I spent the time separating the front and back threads. I used a weaving sword or pickup stick (whatever) and lease sticks.
Here are a few terms for you if you are new to weaving (I can feel eyes glazing over):
A weaving sword or pickup stick is a long, thin, flat, slat of wood that is pointed at one or both ends. Its purpose is to slip in between the threads so you can lift or pick up all of the warp threads at once in order to weave.
A lease stick is also a long, thin, flat slat of wood, with the ends rounded, not pointy. It is slightly thicker than the sword. Lease sticks are usually included when you buy a modern floor loom. A lease stick should be slightly longer than your warp. If you have a place that sells lumber, like one of the warehouse hardware stores, they would be cheap and easy to make. Lease sticks must be sanded smooth so the warp won't catch and snag or fray.The purpose of lease sticks is to keep the cross of the threads.
The cross (weaving, not Christianity) is where the front and back threads cross each other so you can pull the back threads forward in order to weave.
In order to make things a little easier, I am going to refer to the group of warp threads in front as the A threads. The warp threads in back will be the B threads. With a warp weighted loom, the front and back threads are divided by the bottom brace, and weights are hung on the warps instead of wrapping the warp between two beams as in more modern looms.
Now that we have definitions of terms, we can proceed. I picked up every other thread in a group of 10, and slipped it on top of the sword, so that I had 5 in front and 5 in back. When I was done, I stuck a lease stick in the shed.
Next, I took the back threads and brought them forward through the front ones, and slipped the sword in between them. I did not finish this part by the end of class. I only have a few more bundles of 10 to do, though, so I am happy with my progress. Besides, next time, I will bring my camera so I can take pictures!
 |
| The bottom stick is a lease stick and the top pointy one is a weaving sword. The threads in front of the bottom stick are the A threads.. |
 |
| Taking a group of threads and dividing them. |
 |
| A pair of threads: A and B. A is on the right. |
 |
| I slip the A thread to the front of the lease stick. Note that both threads are to the front of the weaving sword. |
 |
| Now the A thread has been slipped behind the sword. The B thread has been slipped behind the lease stick and to the front of the sword. |
 |
| The blue thread on the counter is a loop heddle. |
Saturday, September 29, 2012
Loom Weight Re-design
This is a step-by-step how to on the re-designed loom weights.
I needed something that would be around 8 ounces for this warp. 6 ounces was not enough to hold the bundles of 10 warp threads taut and under tension.
Some friends of mine found some very large washers about 4 inches wide. Two of them put together weigh around 8 ounces, maybe a bit more.


I needed something that would be around 8 ounces for this warp. 6 ounces was not enough to hold the bundles of 10 warp threads taut and under tension.
Some friends of mine found some very large washers about 4 inches wide. Two of them put together weigh around 8 ounces, maybe a bit more.

This is one pair of washers after I glued it together.

I used Glue dots in line form to glue them together.
You can see the line on the right side of the washer in the photo.

This is a glued weight. I'm wrapping it using brown florist's tape or stem wrap.

Here is the finished weight.

Two down, 34 more to go! :)
The one thing that concerns me is that the ends of the stem wrap don't stick very well. I wonder how they will hold up to a weeks' worth of clinking and friction. I may want to make yarn holders for them like I did for the clay ones, so that the yarn is not rubbing on the tape and getting sticky.
Making String Heddles for the Warp Weighted Loom
I've started making heddles. I'm making loop heddles because I'm not sure that I can make a continuous string heddle to a consistent length.
Some years ago, I bought some wooden dish drying racks at a 99 cent store with the idea of using them to wind warp crosses. There are too many prongs to do that right, so they've been sitting in my garage for several years. I have a problem throwing things out, especially wooden ones. I decided to use a rack to make string heddle loops.

I am making two sizes, one using all 8 pegs on a side which makes it about 8 to 10 inches in diameter, and one using 6 pegs which makes it about 4 to 6 inches. I made a loop using 4 pegs, but I decided that would be too small.
There are two options with loop heddles.
The first is to just "fold" the loop around the warp thread and slip the heddle bar through the two ends of the loop. This is the method that is set out in the Schact Tapestry Loom instruction manual. You can look this up online at http://www.schachtspindle.com/instructions/weaving/tapestry-loom.pdf. The heddle instructions are on pages 5 and 6.
The second option is to make a slip knot with the loop around the warp and a slip knot around the heddle bar, or just stick the bar through the other end of the loop.
I will probably use this second option, because it gives more length on the heddle. The shed depends on the angle of the loom and the amount of weight you have on the warp strings. Because the warps are attached to weights, and not to a beam or to the loom itself, the shed width is not predetermined, like a modern floor loom, tapestry, or frame loom. This is why all the instructions on making and warping a warp weighted loom deal with the heddles last and are not very specific about the length you need.
A third option, if you are not concerned with "authenticity", would be to make or use a frame or harness or rigid heddle. Another blogger I read did just that, but her loom project was more concerned with getting children to weave than with having a period working loom. She made a rigid frame heddle out of popsicle sticks.
To my knowledge, using a rigid heddle on a warp weighted loom is not period to first century AD, but I'm not an expert. Who's to say that it couldn't have developed? As far as I know, there is no documented period evidence for a harness-type heddle used on any warp weighted loom. If anyone finds any evidence for this, I would love to see it. I'm sure anyone else who has studied this would, also.
Some years ago, I bought some wooden dish drying racks at a 99 cent store with the idea of using them to wind warp crosses. There are too many prongs to do that right, so they've been sitting in my garage for several years. I have a problem throwing things out, especially wooden ones. I decided to use a rack to make string heddle loops.

 |
| This is the 8 inch loop. I decided to use this one. |
There are two options with loop heddles.
The first is to just "fold" the loop around the warp thread and slip the heddle bar through the two ends of the loop. This is the method that is set out in the Schact Tapestry Loom instruction manual. You can look this up online at http://www.schachtspindle.com/instructions/weaving/tapestry-loom.pdf. The heddle instructions are on pages 5 and 6.
The second option is to make a slip knot with the loop around the warp and a slip knot around the heddle bar, or just stick the bar through the other end of the loop.
 |
| Putting the string heddle around the warp thread. |
 |
| This is what the larks head should look like around the warp thread before you pull it tight. |
 |
| The back threads, with the heddles attached. The threads are to the "front" because I was creating the "cross" with the flat sticks you can see. |
I will probably use this second option, because it gives more length on the heddle. The shed depends on the angle of the loom and the amount of weight you have on the warp strings. Because the warps are attached to weights, and not to a beam or to the loom itself, the shed width is not predetermined, like a modern floor loom, tapestry, or frame loom. This is why all the instructions on making and warping a warp weighted loom deal with the heddles last and are not very specific about the length you need.
A third option, if you are not concerned with "authenticity", would be to make or use a frame or harness or rigid heddle. Another blogger I read did just that, but her loom project was more concerned with getting children to weave than with having a period working loom. She made a rigid frame heddle out of popsicle sticks.
To my knowledge, using a rigid heddle on a warp weighted loom is not period to first century AD, but I'm not an expert. Who's to say that it couldn't have developed? As far as I know, there is no documented period evidence for a harness-type heddle used on any warp weighted loom. If anyone finds any evidence for this, I would love to see it. I'm sure anyone else who has studied this would, also.
Wednesday, September 26, 2012
Weights, warp and very tangled threads!
Well!
Note to self:
When you are gluing things with superglue you only need one drop! I did not know this, so I had to pry the prospective loom weight off the kitchen table. Some of the finish on the table went with the loom weight. Oh well.
The florists' stem wrap tape worked very well to cover the metal weight, but it isn't very sticky at the ends. It does the job, though. Maybe I just got some old tape, or something.
I started back at the T.U.S.D. adult school with the hand weaving class again! Yay! This class is a super deal! You can weave whatever you like on any loom and you just supply your own yarn. This session, I'm trying to figure out a better way to rig the heddles on the loom.
The class started last week. I spent the whole class trying to untangle the threads and unroll the weaving. I got most of the weights untied last week.
This week, I got it unrolled and re-grouped the threads in tens. I have 440! What was I thinking!!!! I will have to mix the weights, but I think I have enough to put the heavier ones on the back threads and the clay ones on the front threads. It's the back threads where the weight matters. Most people will see only the front weights, if they notice them at all.
I need to get a cone of butcher or kitchen string, or something and make a variety of sizes of loops. I think I will try 8, 10, and 12 inch loops. That should give me a 4, 5, and 6 inch pull...I think. So, I will sett a 1-3 twill, to practice the loops and see what works. That way, I will only have to make around 110 of each loop, and only make 330, because the front ones don't need them.
A couple of other notes about loom weights: The heavier the warp, the more weight you need to create the proper tension. With a lighter or finer warp, you need less. How much is missing from most of the instruction material I've examined.
Here's what I think:
For heavier, "normal" (i.e. worsted weight) yarn that you'd buy at a craft store (like Joann's, or Michael's, or your local yarn shop), you'd need between 8 to 12 ounces of weight per 10 to 12 warp threads.
If you are using a lighter yarn, like a sport weight, then you will need between 4 and 6 ounces.
If you are using weaving yarn like an 8/2 or smaller on the warp weighted loom, then you might only need 2 to 3 ounces per 10 to 12.
You should also seriously question your sanity, in that case. Of course, since you are going to set up a warp weighted loom, you're probably already halfway there, in the minds of your friends, relations and significant others.
Why? I'll spell it out for you: a fine warp and weft are harder to see. It is easy to miss threads. It also takes longer to weave yardage on your project. It becomes what is known as a character-building, educational, bonding experience. ("no discipline seems pleasant at the time, etc...").
Now that's not to say that you can't do this, it's just more difficult to do. It is possible to use a weaving-type yarn for the warp and a thicker one for the warp. That was and is done quite a bit. You could, for example, use a linen warp and a wool weft, unless you are terribly concerned with shatnez, or intend to actually wash the resulting cloth with modern machinery instead of, say, pounding it clean with some rocks, or something.
I would not use a warp heavier or bulkier than the "worsted weight" yarn. A bulky-chunky yarn would have you up to about 12 to 16 ounces per 10 and that may be too much weight for the beam, altogether. You could make a thicker beam, if you wanted, I suppose. I wouldn't.
I'm about 5' 2". My beam is about 5 to 6 feet long and 4 inches in diameter, it's wood. As I mentioned above, the current project has 440 wool warp threads. I can not carry the beam very far when it's weighted and have serious problems lifting it into place.
The more ends per inch, the more weight you're dealing with. It's not just the loom weights, either. There's the weight of the beam, yarn, heddle rod or rods, as well as any sticks, cloth or cardboard you use to put in between the woven layers. This is something you need to consider when you are making your loom and warping the project. Do you have help to lift the beam, or is it just you? Don't go giving yourself a hernia.
Tuesday, October 4, 2011
Gearing up for Journey to Bethlehem, 2011
So my church, Journey of Faith in Manhattan Beach, is putting on Journey to Bethlehem in the lower parking lot after a sabbatical year in 2010. I'm back doing research and development for this.
I had cut the project off the loom last time because I didn't know if we were going to do this ever again. This time around, I have to start from scratch. Right now, I'm planning the new project for the demonstration. I'm thinking of making a 2/1 twill set, but I'm not sure how to go about that on the loom.
They should get the box down for me from the attic by Sunday, then I can see what I'll need to order as far as spinning wool and the like.
I need to get more clay for loom weights and more lead fishing weights.
I'm going through my boxes here at home and digging out all the wool handspun that I can find, to see if there is enough to make a header cord. There probably is. It's going to be rather motley, though.
My oldest is a senior so he's got an SAT class tonight, I've got to find out where at Hamilton the class meets, so I'm stopping here. More later when I start with the header cord.
Sunday, December 21, 2008
Things I've learned this year at Bethlehem
This year, I didn't learn anything really earth-shattering, but more nuances to what I already had learned.
I looked up a few things about the state of travel and the roads. I came across a quote in Churchill's "Birth of Britain," the gist of which was that in Britania, a lonely outpost of the Empire--the wild west of the time, a woman could walk the roads alone from one end of the land to the other and not fear for her safety. My opinion, in the lack of anything else I could find on the subject, is that if such was the case in Roman Britain, how much more so in Judea and the Gallilee. Obviously, then as now, if undertaking a journey, one would take normal safety precautions, such as not venturing into "bad parts of town" such as the Jericho-Jerusalem road, or into Samaria, if Jewish and vice versa. But I got the feeling that for a woman to travel alone was as normal as a woman travelling alone coast to coast by plane, train or automobile would be nowadays.
We tend to look at the state of women's rights at the time of Jesus and assume that women were as restricted as they are now in that part of the world. Such may not have been the case. One thing I have found is that everything we think we know about Judaism by comparing the practices today and the laws in Leviticus, and so on, may not be what it actually was at the time for the majority of people. This is a bit of an understatement, but Judaism would have had to have changed radically after the fall of the Second Temple. Those who were scattered had to adopt some of the practices of their surrounding neighbors in regard to the women, just to ensure their own safety. People will give up freedom, and other things dear to them in order to have some level of security in life.
I was asked by one of the visitors if I didn't mean woof insted of saying weft for the horizontal threads in weaving. I prefer to use the term weft because I refuse to sound like a dog and either term is acceptable in English. One of the other spinners asked me what was the term in Hebrew, so that evening, off I went to the translation sites. I found the words for both warp and weft, but what was interesting to me was the word for warp threads, dallah, with the accent on the last syllable. Dallah indicates something that hangs down or dangles and is also weighted down--which aptly describes the warp on a warp-weighted loom! Dallah was also used to describe the "masses;" those whom we would call "pawns" nowadays. People who aren't really important in and of themselves, but hold the fabric of life together in mass and are weighted down with the cares of life.
One thing I look forward to every year with Bethlehem is the new insights I gain on the Bible. Sometimes it is only a sharpening of focus. Sometimes it is like hanging a modern art painting a different way--vertically instead of horizontally. Something that makes you say, oh! I never thought of it quite that way before. What I find is that the things that the Bible says are accurate. We have problems understanding because we have not discovered the evidence that sheds light on the text yet.
I think the most important thing I learned is that a loom cannot be warped in strife or stress if you want the weaving to turn out right. You must be calm and focus. You must not be concerned about how much time it is taking or how long you are going to be. That is the path to discouragement. Making the heddles is tedious and time consuming, but you have to go through it--like pregnancy--only it doesn't take nearly that long. I also learned that the groups of 10 warp threads need about 5 or 6 ounces of weight each to hang properly, and each air-dried clay donut weighs about one ounce each. I had to make more weights this year.
Those whose hope is in the Lord will be restored.
They shall fly on eagles' wings.
They will not be wearied from running,
Nor will they faint from walking.
Sunday, December 7, 2008
Journey to Bethlehem, 12/07/08
2,468 tonight! Yaaaay!
There are now 6 to 8-ish inches of cloth on the loom. I am pulling the blue shed threads forward and holding them while passing the shuttle through. That works best.
A lady I'd invited from my Curves exercise place came tonight. I had many very little helpers weaving and some adults who were brave and tried it also.
Kudos to the Gonzales family! Another lady who goes to my Curves and a lady who is in a weaving class with me both mentioned that they had heard about Journey to Bethlehem from them this year (in addition to hearing about it from me and Rose Ungerman!)
Fun things to say to the visitors to Bethlehem:
Ask the children what the Angel said. Tell the ones who answer correctly to go and come back and tell you how much does he weigh, does he look like his mom or his dad, and how long is he? You know, the things everyone asks complete strangers with a newborn.
One little boy who did not answer correctly was scolded by his older sister who said he never listens! I said they should put him with our rabbi and if he did not listen, the rabbi would beat the torah into him! (they laughed.)
People who have the cell phone thingies in their ears: Sir/ma'am, there is fire coming out of your head! You should be more careful! Put it out before your hair catches fire!
Children with blond hair and/or blue eyes. Tell their parents they will have no trouble finding matches for them. Or tell them to beware the Romans because they like to buy slaves with hair that color so they can shave the hair of the slaves to make wigs for themselves.
I can't wait for tomorrow night! It is sad that it is our last night at Journey Manhattan
Saturday, December 6, 2008
Journey to Bethlehem 2008
2,049 people!
The loom worked! The warp is kind of sticky and I made the heddles too long, but I've got two inches on it! What I do is this. Since the "blue" shed (the heddles are blue) is annoying, I weave that. Then I have the open shed ready for someone who wants to weave. I can't weave all the time--you have to interact.
It's not about the weaving. It's about what life would have been like, sort of, in Bethlehem when Jesus was born. Sort of.
We are portraying the birth of Jesus and our ultimate aim is to bring people to Him. Because people think they know what the birth of Jesus was like, we have some things that may be historically or even biblically inaccurate, like the presence of the wise men, for example. But people expect to see some of these things, so we find a way to explain their presence if anyone asks. We walk a thin line between what people expect to see and what people will accept as different.
Thursday, December 4, 2008
Journey to Bethlehem Dress rehearsal
Well, another dress rehearsal Journey to Bethlehem has come and gone. The census taker said we had 750 people come through tonight. Last year, I think we had maybe 400 something.
I spun camel hair on my "toy" spindle--it's a dowel rod I sharpened in the pencil sharpener and cut a groove into with scissors all round at the top and I use a toy wooden wheel, courtesy of Joann's for the whorl. My fingers hurt.
Tomorrow, we will have the loom up, so I will work at it. Donna, my "newbie" spinner is doing very well. She is making a varigated blue and white yarn on her spindle and has a lot done so far. It should be full by tomorrow night.
I can't wait for tomorrow night!
Meditation at the loom
The loom is warped! yayyy! Here are some thoughts I had while working today.
I sit at the back of the loom, picking up colored thread from the heddle bar and bringing it through to tie on the strings of the back warp, one by one. I have made mistakes and skipped a total of four strings in the front, so I had to start over. That was yesterday's work. If you warp a loom in strife, this is what happens.
The room is quiet. There is a ladies group meeting a couple of rooms over, and I hear their Christmas music playing. I concentrate on the strings in front of me. It is like a harp, but the strings make no sound if you pluck them. I feel the presence of the countless thousands of women through the ages past who did just what I am doing--tying heddles--on looms just like this one. I must not hurry. I must be calm. I must concentrate on the threads.
Hurrying makes your work go slower. You cannot be calm when you rush. You cannot concentrate on the threads. I pick up the blue thread on the stick at the front and bring it through and tie it. I do not look at the threads I have finished, I do not look at the all the ones left to do. I look at the next one, move it over four threads and bring it through and tie it.
Outside, there is strife and hurry and other things to worry about. At the loom, it is quiet and peaceful. I quiet my mind and reach for another thread.
Weaving is more than throwing the shuttle through the warp. Weaving is also setting up the warp. It is lashing the header to the beam. It is separating the front and the back threads. It is making and tying the loom weights to the warp, and knitting the spacer cords. Weaving is also tying the heddles to make the second shed. Weaving is mostly preparation--what most people see as weaving is the result of much preparation. I reach for another thread.
Wednesday, December 3, 2008
The weights
Yesterday afternoon, I took my 6th grader to Joann's and we got the air drying clay, a fondant rolling pin (I am NOT using my good wooden rolling pin to roll out clay!!!!!), a set of brushes because mine keep disappearing, and a push mold for faces.
I made the clay weights out of my clay and he tried to make the jar bottoms from his. Once I got my weights done, I helped him do his jars. We ended up rolling out the clay and covering old medicine bottles we dug out of our recycling bin. There are four. I will have him do the human one tonight, because it is the easiest--it has the push mold for the face. I will have him use some of my glass beads I have for jewelry for the eyes.
The weights turned out well. They didn't dry completely last night, by the way. I didn't want to set them on the furnace floor vent, but I probably should have. Last time, I set them in the sun for two days. Last time I also made them much earlier in the year. It has been foggy and cold (for Los Angeles) this past week. However, they are somewhat dry and I don't think they will lose their shape if I hang them. I'm not going to run the warp directly through them, though. I'll make string loops and use those.
If anyone reading this is interested in warp weighted looms, please note: I use air dry clay because it's easier and doesn't flake if the weights clink together. I usually use wire or string to tie the weights to the warp, because I don't want terra cotta color on my warp! The warp is wool and I'm going to use the wool we have spun for the weft. The story is that the governor has commissioned a white wool homespun tunic just like Augustus wears. So, being a good businesswoman, I'm charging him three times the regular price because he's from out of town (the meaning of "special price, just for you!").
Audrey
Tuesday, December 2, 2008
The Warp-Weighted Loom
For the past three years in Journey to Bethlehem at Journey of Faith, I have been trying, without success (for various reasons), to have a working warp-weighted loom in operation. Every year, I leave the steps I accomplished the previous year as intact as possible and roll up the project and dismantle the loom. (Yes, I know it's bad for the project, just deal with it, okay?) I have to be home when my kids get out of school, so I can only work on it in the mornings.
So, yesterday, Monday, I went up to church to check on the wool box and put the loom up. The wool box was fine--no moths! Yayyyy! I put together the loom. Thanks to Ron, it is all properly bolted down so it won't list from side to side.
I lashed the warp to the beam and untangled it. The loom is very wide, so I got someone else to hold the spacer cord on the one side, while I tied the other side to the uprights so it would be stretched out evenly and match the front warp. Thank you man with the cut on the head!
That was yesterday.
Today, I got the weights attached. Well, some of them, anyway. I need to make about 10 more. I figured out I need about 5 to 6 ounces for every 10 strings to make the warp hang straight. That's with this particular warp. The weights I made a few years ago are about one ounce per clay donut and a couple of them have broken. I am hanging about 5 donuts together from the warps.
I started to attach the back threads to the heddle rod, but realized that the weights needed to be fixed first, since one weight on 10 strings wasn't working.
Tomorrow, I plan to attach the new weights and, finish attaching the heddles and it will be ready to weave on Thursday.
I have to take my kids to Joann's to get more clay--how fortunate that my 6th grader has decided to do canopic jars for a social studies project!
More tomorrow.
Audrey
Tuesday, December 26, 2006
Through a grimy window, darkly
First of all, Hadasseh Aragi is the name of the character I have played in Journey to Bethlehem for the last 5 years. Hadasseh means "myrtle" and is the name of a pink flowering shrub/tree which was used as a dye source. Aragi means weaver.
There wouldn't have been just one or two people doing all of the spinning and weaving for the entire town of Bethlehem. Each woman and girl would have been spinning in any spare time she could beg, borrow or steal. All yarn or thread spun would have been meant for either weaving, sewing or embroidery, and almost all women would have been weavers. If they had slaves and were rich, still they would spin and weave, even those in the family of Augustus Ceasar.
It is my privilege to provide a glimpse through a very grimy window into the everyday lives of women at the time of Jesus' birth. We urge people after the angel's and the shepherd's message to "go and see and then come back and tell us how much he weighs, is he healthy, how long is he? Does he look like his mother or father?" These are things every woman asks even of complete strangers with a new baby.
A new life is a reason to rejoice. It sounds hokey, but if even one person is moved to begin a new life in the Messiah because of their experience at Bethlehem, we should rejoice all the more.
Hadasseh Aragi
(Audrey M. DeNeui)
Subscribe to:
Posts (Atom)