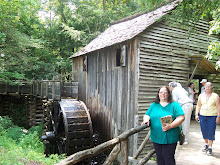
Well, THAT didn't work. I was unable to get the warp weighted loom fully functioning yet again this time. I lost the cross while moving it back and forth. There were other problems, too.
Major Problems:
The loom must be completely assembled FIRST, in place, in order to properly warp it. The set is in the church parking lot and we don't have access to it until a week before production. The loom has to be moved, and time is lost untangling the warp and setting it back up again.
The loom is basically a very large prop and resembles a bunch of lumber and sticks when it is not assembled. Pieces were broken and some were missing this year.
Warping and setting up the loom took a huge physical toll on me this year. I would work setting up the loom for 4 to 6 hours, but then I was a basket case for the rest of the day and the next. I could not move without intense, crippling pain. I bulled ahead and did it anyway, and I became a weeping exhausted mess.
I've come to the conclusion that I can't and won't do the loom next year. I can't do it by myself and with no one else interested in learning how to do it, it seems pointless to continue. If we have a loom at Journey to Bethlehem in the future, opting for a double beam vertical/tapestry or variation of the Navajo loom set-up would be wiser.
Instead, I will spin. I want to try my hand at spinning flax again. I will wait and see if we are actually going to run the production this year and think about supplies then.
Saturday, February 16, 2013

Friday, December 14, 2012
My Review of Ashford Student Top Whorl Spindle
Originally submitted at VillageSpinning & Weaving

Ashford Student Top Whorl Spindle Reasonably priced and ideal for teachers needing spindles for teaching. . . or for a beginner who wants something inexpensive. Approx. 2.8 ounces, approx. 3'' whorl d
An excellent spindle for beginners
By Crochet Lady from Torrance, CA on 12/14/2012
Pros: Powerful, Durable, Good Design, Safe, Easy To Use
Best Uses: Home Use
Describe Yourself: Avid Do-It-Yourselfer
The only fault I had with it was that we had to cover up the spinning wheel design on the top of the whorl because we were using it in a re-enactment, but most people wouldn't use it for that. I've used an Ashford student top whorl twice to teach people to spin and I'm very pleased with it.
(legalese)
Sunday, December 2, 2012
Detangled!
 |
| The yarn is all untangled, the warp is neatly chained and ready to travel! The blue threads are the string heddles. |
I am so happy this is done. I still have to put the heddles onto a rod, make spacer chains for front and back threads, and hang the weights.
Most instructions have you weight the warp after you've sewn the warp to the beam. This is followed by making a spacer chain. The final step in the instructions is attaching heddles to a bar.
This is fine if you don't have to schlep the loom anywhere. I, unfortunately, DO. For this project, 44 weights at 10-ish ounces each, makes the beam come in at about 30-ish pounds. The beam itself is about 6 feet long. When I'm carrying it (without weights), I have to be careful not to hit anything or anyone in a "Three Stooges" type maneuver. When fully weighted, it is difficult for me to carry for a long distance (like half a block). Yeah, I'm wimpy. So what?
If you've made a mistake in your threading, or missed a thread and already put the spacer and the weights on, then you have to untie the weight or weights affected, and unchain the spacer...essentially re-do the whole sett, which is a total, complete royal PAIN in the behind. If you put the heddles on first, the problem is easier to correct.
These are my steps to warping and setting the Warp Weighted Loom:
1. Measure the header band warp. I made this project 4 feet long, with 20 threads, because that's how many slots there are in my warping paddle. I measured the yarn by placing two of my dining chairs back to back with about 4 feet of space in between them and winding the yarn on them.
2. Measure the warp pairs. Again with the kitchen chairs, only this time I placed the chairs 10 feet apart. See post from 10/22/11 if you want to know about warp pairs. *Chain the threads until you are ready to use them. I chained them in groups of 10.
*When I say that you chain the warp, you chain stitch a bunch of threads using your fingers, instead of a hook. If you don't know how to crochet, learn the chain stitch. There are lots of free videos and instruction books on this.
3. Thread the rigid heddle (or warping paddle) and weave the band. I tied each end of the warp to a kitchen chair, stretching it taut. I then unchained a braid of warp threads and wove the band. The warp threads are very long, so when I finish 10, I chain them to keep them tidy.
You can make a band using an inkle loom or using cards/tablets. Look up Inkle weaving, and Tablet or Card Weaving, if you are interested in these methods. It is possible to make a band with a nifty pattern this way.
When you have the length you want, untie the end where the warp paddle is, first.
Next, slip the warp paddle off the threads.
Make an overhand knot to keep the band from unravelling. Untie the other end of the band and do the same. You can hemstitch the band if you want to, or wait until the project is finished to deal with it.
4. Sew or attach the warp band to the beam. I sewed the band directly to the beam. You could also whipstitch it to a dowel rod and suspend that from the beam, Navajo weaving style, if you aren't concerned about doing it "period".
5. Make string heddles for the back threads. For a first time project, keep it simple. Simply divide the number of total warp ends in half and you will have the number of string heddles you will have to make. It might be a good idea to make a few more than you need in case one breaks while you're weaving.
It is possible to do more than 2 "shafts" on a warp weighted loom, but it's a lot of work. If you are going to attempt a 4 (or more) heddle pattern, use a different color for each of the 3 (5, 7, etc.) heddles, or alternate colors (i.e. blue for B, red for C and white for D, etc.). I made my string heddles using a wooden dish rack I got at the 99 cent store and a ball of size 3 crochet cotton. (See the 9/29/12 post).
I used cotton for the string heddles. I wanted something that would stand out from the feel of the wool warp. I also wanted something that would not stretch and would not abrade or stick to the other warp threads.
6. Attach the string heddles to the warp. I made a lark's head knot around a warp thread. I attach the other end of the string loop to the bar in the same way. You don't have to hang up the beam for this step.
7. Hang up the beam, and divide the warp into front (A) and back (B) threads.
8. Crochet a spacer chain for the front and back sets of threads. Tie each spacer to the uprights on either side. I use a yarn or thread with a similar gauge to the warp yarns. I use cotton or linen instead of wool for the same reasons I explained in point 5. I use a crochet hook in the size that is recommended on the label of the yarn, or the same size that is recommended for the warp yarn.
9. Hang or tie the loom weights. As I mentioned in a previous post, if you are using a medium to heavy "worsted weight" yarn, use between 8 and 12 ounces per weight.on each group of 10 threads. The weights should not touch the ground. If the warp is too long, chain it up and then tie the loom weight to it.
10. Weave. If you are outside, and it starts to rain, snow, or if there is a lot of wind, move the project inside. Detach the loom weights (if you are storing the beam), untie the spacers from the uprights. Put a tarp on the ground and carefully roll the tarp and the project up together, jelly roll style. Tie up the rolled warp in a few places so it won't come undone. Bring the beam inside. The loom will act as a sail if there are high winds. This can be dangerous. Plus, if it gets wet, it will take a couple of days to dry completely.
Sunday, November 11, 2012
Tangled Webs and Cardboard.
Weaving class is over--for this quarter, anyway. I got the string heddles done and put on the loom.
The warp beam has been residing in the back of my van for the past two weeks. I had to move it when the family went out to dinner on Friday. I had the boys put it on top of the washing machine in the garage. I did laundry today, so now it's in the front room.
I've been trying to untangle the bottom part of it. I got the old spacing chains from last year off. That was a major hassle in trying to untangle things.
You are probably now screaming at your monitor "Why is it so tangled? How did she let this happen? Didn't she know it would be an Herculean task later?" Angst, angst, angst!
(Since you're probably reading this because I posted the link on my facebook page, you may NOT be yelling things at the computer and are getting the glazed eyeballed stare of impending death from boredom. If you are related to or are well acquainted with me, asking the above questions is kind of pointless, isn't it, because you know the answer is "Because it's Audrey!")
For all two of you who may not have known me since kindergarten and before, I will answer the questions in the form of a prescription for rolling up the loom with a work in progress. But briefly, Yes, I did know it would be this difficult later when I rolled up the beam the way I did last year.
Last year, at the end of the last night of Journey to Bethlehem, it was fixing to RAIN. Hard. I got the beam down and took it up to the props room, somehow. I don't remember that exactly. I packed up all my things, and then got my son to help me roll up the beam very quickly, so we could get it to my van before it started raining. It was starting to sprinkle as we walked to the car. Not just sprinkle spray, nope, it was slooooow, BIG, fat, drops of water, picking up speed with each succeeding drop.
If you are doing a warp weighted loom for demonstration someplace, a renfair, an SCA war or a re-enaction event, you will have to disassemble and move the beam and the loom with an unfinished project on it, unless you are a blindingly fast weaver.
Put a tarp, canvas, or a large piece of corrugated cardboard flat on the ground in front of the loom. Take down the beam, and place it just above one end of the tarp. Roll up the beam the way you do when you are rolling the woven cloth onto a modern floor loom with the cardboard.
Cardboard isn't period at all, unless it's late 1800's, in which case, you wouldn't be using a warp-weighted loom. It would be difficult to wind a sheet of cardboard on the beam because of the way the loom is configured. I suppose you could use sticks, but then you risk snagging the fabric. If you are rolling it up to move and "historicity" is important, then you could use a canvas, or maybe one of those bamboo mats like they sell at a hardware warehouse store in the garden department.
By the way, when you started weaving did you know that you need to have a refrigerator box worth of corrugated cardboard for both beams? I didn't know this. What is more, I haven't come across much on this important little tidbit of information in any weaving pattern, magazine, or book I've seen. Of course, it's possible I may have missed something. I haven't read absolutely everything there is out there on the subject and I usually only read English language publications.
You get this information from another weaver, and it's usually an offhand, "oh, roll some cardboard in between the layers on the threads and the cloth beams so they don't stick to each other."
So what did weavers use before cardboard was invented? Most likely they used sticks. I've seen that mentioned, once, fairly recently in a magazine article, I think. I tried to Google this and was unsuccessful in finding the topic. So if you see this and have any historical information on it, please comment and let me know.
Tuesday, October 23, 2012
Ricotta 2
Making Ricotta again!
This time, I'm doing things a little differently. I made a half batch, that's a half gallon of whole milk and two cups of buttermilk. I'm checking how long it takes to get from fridge temperature to the required 180 degree mark.
At 10 minutes in, the milk was at 100 degrees, according to the candy thermometer.
At 17 minutes, it is looking "cottage cheesy" and resembles the ceiling texture in most of my house. The temperature was 150.
It has now reached 180, and that is at about 20 minutes. Now to ladle it out and let it drip for an hour.
It's easier working with a half batch.
Wednesday, October 17, 2012
Plans and spacer chains and heddles! Oh, my!
It occurs to me that you might be interested in my warp weighted loom plan. I need to give credit where it is due. The plans I have used are mainly from the old Early Period Magazine. It was an SCA publication, I think. It has not been published in quite some time, but here is the link to the archives:
The articles are in Issues 2 and 3, Making a Warp Weighted Loom and Warping Your Loom, respectively. These plans have been THE most helpful to me, mainly because there are drawings to look at. If you want to use the plans from these two issues, send the people who run the website an e-mail and ask for permission. I'm sure they will give it--when I asked, they were very nice--but it's better to ask first.
When I began researching this topic, there wasn't a lot of information out there. There is more now, including some particularly good videos on YouTube by a young man who was doing a college project. I have not found any plans that are the equal of the ones from Early Period Magazine, which was the first set I came across. The videos give additional visual impact, but merely add to the information already presented. What I'm doing here is relating my experiences with warp weighted looms.
Some plans I came across call for "sizing" the warp. Sizing means putting a mixture of glue and water (or starch) on the warp threads so they will be stiff and strong while you are weaving them. You have to wash it out of the project when you're done. I don't think this is a necessary step for the time period I'm working in (1st century BC-AD). I also fear that if I tried to do this, it would result in a huge sticky mess. It also assumes that you are using crochet cotton for the warp. I don't really want to think about trying it on wool.
The sizing recipe calls for 4 to 5 pints of water per one pint of Elmer's school glue. You mix it up and toss the skeins of warp into it, squeeze out the excess and hang it up to dry.
If you don't have a wide-ranging primitive or small loom background, such as a familiarity with backstrap, rigid heddle, tapestry or inkle looms you may have problems with some aspects of the Warp Weighted loom. When I started this, I had absolutely no idea what I was doing or getting into. I had woven two projects on a table loom in high school some 25 years ago (30 now!). You may be far more ahead on this than I was.
As I mentioned before in the post of September 29, 2012, entitled Making String Heddles for the Warp Weighted Loom, I have trouble making the continuous heddles. Another blogger here on blogspot used a netting shuttle to make her continuous heddles, but she has experience with backstrap looms. (I, on the other hand, had to look up what in tarnation a netting shuttle was!) On my current project, I've decided to make loops. The author of the Early Period articles covers string heddles in much more detail than anyone else, including diagrams of how to make a continuous heddle and spacer chain. If you have trouble interpreting a static image diagram, such as stitch illustrations for crochet or knitting, you will have difficulty interpreting these, also.
As I mentioned before in the post of September 29, 2012, entitled Making String Heddles for the Warp Weighted Loom, I have trouble making the continuous heddles. Another blogger here on blogspot used a netting shuttle to make her continuous heddles, but she has experience with backstrap looms. (I, on the other hand, had to look up what in tarnation a netting shuttle was!) On my current project, I've decided to make loops. The author of the Early Period articles covers string heddles in much more detail than anyone else, including diagrams of how to make a continuous heddle and spacer chain. If you have trouble interpreting a static image diagram, such as stitch illustrations for crochet or knitting, you will have difficulty interpreting these, also.
 |
| My loop string heddles. |
I do my loom set up before Journey to Bethlehem opens. Weeks before, in theory, but sometimes life happens. I don't do it in costume and I don't use period correct tools; I use scissors, crochet hooks and a tape measure. During production, if anyone is interested, they can weave a couple of picks.
Another thing to consider is spacing the warp with a chain (I crochet mine, that's the easy part) and your eyesight, if you are using weaving threads. You don't have to crochet it, you can make the chain using just your fingers (that's in the House Barra archive, too). Crochet is not period (1800's I think). Unless you are doing the set up as part of the demonstration and need period accuracy (and there are people around who will KNOW the difference and will take points off or something) or you don't know how to crochet, I wouldn't worry about the anachronism.
 |
| This is a spacer chain on a previous project from 2006. |
Either use the same type of thread you are using for the warp, or at least the same or smaller weight or ends/wraps per inch for the spacer chain. My current project uses a wool yarn warp and weft. If I were to use the same yarn, then it would stick together. I'm going to use a blue cotton/bamboo size 3 or 5 crochet thread for the spacer chain and heddles. This is so I can see and feel the difference the chains and heddles from the project in the dark, since our production times are always at night.
If you are crocheting the spacers, use the crochet hook recommended for the gauge of the thread. For example:size 5 to 7 steel crochet hook for a size 10 bedspread cotton. The larger the number on a steel hook, the smaller it is, whereas it's the opposite for the aluminum and plastic ones. Why does it depend on the gauge of the thread? Because I used a plastic M or N size hook, once, when I had a warp that (if crocheting) normally took a size D or C hook. The spacer made the warp too wide for the weaving width and I had to re-do it.
Wednesday, October 3, 2012
Warp Weighted Loom Update
So last night was Tuesday and weaving class. Someone at class mentioned that I should take pictures to document what I was doing. So I will do that next time I'm at class and post them here.
Last week, I had counted the warp threads and slip knotted them by groups of 10. The final count was 440! This week during class, I spent the time separating the front and back threads. I used a weaving sword or pickup stick (whatever) and lease sticks.
Here are a few terms for you if you are new to weaving (I can feel eyes glazing over):
A weaving sword or pickup stick is a long, thin, flat, slat of wood that is pointed at one or both ends. Its purpose is to slip in between the threads so you can lift or pick up all of the warp threads at once in order to weave.
A lease stick is also a long, thin, flat slat of wood, with the ends rounded, not pointy. It is slightly thicker than the sword. Lease sticks are usually included when you buy a modern floor loom. A lease stick should be slightly longer than your warp. If you have a place that sells lumber, like one of the warehouse hardware stores, they would be cheap and easy to make. Lease sticks must be sanded smooth so the warp won't catch and snag or fray.The purpose of lease sticks is to keep the cross of the threads.
The cross (weaving, not Christianity) is where the front and back threads cross each other so you can pull the back threads forward in order to weave.
In order to make things a little easier, I am going to refer to the group of warp threads in front as the A threads. The warp threads in back will be the B threads. With a warp weighted loom, the front and back threads are divided by the bottom brace, and weights are hung on the warps instead of wrapping the warp between two beams as in more modern looms.
Now that we have definitions of terms, we can proceed. I picked up every other thread in a group of 10, and slipped it on top of the sword, so that I had 5 in front and 5 in back. When I was done, I stuck a lease stick in the shed.
Next, I took the back threads and brought them forward through the front ones, and slipped the sword in between them. I did not finish this part by the end of class. I only have a few more bundles of 10 to do, though, so I am happy with my progress. Besides, next time, I will bring my camera so I can take pictures!
Note: It is much easier to do one set of threads (A or B) at a time. The reason I'm doing them at the same time is because I messed up. I skipped several when I was slipping them from the sword to the lease stick.
I still have to make more heddles. I have 10, so far, so that's 430 more to go! Ha. I also have to make more weights.
Last week, I had counted the warp threads and slip knotted them by groups of 10. The final count was 440! This week during class, I spent the time separating the front and back threads. I used a weaving sword or pickup stick (whatever) and lease sticks.
Here are a few terms for you if you are new to weaving (I can feel eyes glazing over):
A weaving sword or pickup stick is a long, thin, flat, slat of wood that is pointed at one or both ends. Its purpose is to slip in between the threads so you can lift or pick up all of the warp threads at once in order to weave.
A lease stick is also a long, thin, flat slat of wood, with the ends rounded, not pointy. It is slightly thicker than the sword. Lease sticks are usually included when you buy a modern floor loom. A lease stick should be slightly longer than your warp. If you have a place that sells lumber, like one of the warehouse hardware stores, they would be cheap and easy to make. Lease sticks must be sanded smooth so the warp won't catch and snag or fray.The purpose of lease sticks is to keep the cross of the threads.
The cross (weaving, not Christianity) is where the front and back threads cross each other so you can pull the back threads forward in order to weave.
In order to make things a little easier, I am going to refer to the group of warp threads in front as the A threads. The warp threads in back will be the B threads. With a warp weighted loom, the front and back threads are divided by the bottom brace, and weights are hung on the warps instead of wrapping the warp between two beams as in more modern looms.
Now that we have definitions of terms, we can proceed. I picked up every other thread in a group of 10, and slipped it on top of the sword, so that I had 5 in front and 5 in back. When I was done, I stuck a lease stick in the shed.
Next, I took the back threads and brought them forward through the front ones, and slipped the sword in between them. I did not finish this part by the end of class. I only have a few more bundles of 10 to do, though, so I am happy with my progress. Besides, next time, I will bring my camera so I can take pictures!
 |
| The bottom stick is a lease stick and the top pointy one is a weaving sword. The threads in front of the bottom stick are the A threads.. |
 |
| Taking a group of threads and dividing them. |
 |
| A pair of threads: A and B. A is on the right. |
 |
| I slip the A thread to the front of the lease stick. Note that both threads are to the front of the weaving sword. |
 |
| Now the A thread has been slipped behind the sword. The B thread has been slipped behind the lease stick and to the front of the sword. |
 |
| The blue thread on the counter is a loop heddle. |
Subscribe to:
Posts (Atom)